The festival of Tu Bishvat is also known as the “New Year for Trees.” The Bible expresses great reverence for fruit trees and special laws were formulated to protect them in times of war. In contemporary Israel Tu Bishvat is celebrated as an ecological awareness day and trees are planted in celebration.
This year Tu Bishvat begins on the evening of January 15th. Here are some fun activities brought to us by Education.com that you can do with your kids to celebrate trees.
Make Four Season Trees!
 What you need:
- 4 toilet paper rolls (or 2 paper towel rolls cut in half)
- Brown paint
- 4 sheets of cardstock or heavy cardboard (light blue works best)
- Construction paper in green, yellow, orange and red
- Handful of popped popcorn
- Brown yarn
- Tape
- Glue
- 4 pieces of string or twine, about 8 inches long
What You Do:
- Tape both ends of a piece of string or twine to the back of each piece of paper, which can be vertical or horizontal. Be sure to leave enough slack in the string so that you can hang the picture.
- Have your child paint the toilet paper rolls brown.
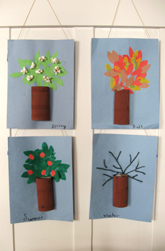
- Show your child how to glue a toilet paper roll on each of the four pieces of paper. Be sure to glue the side of the roll on the paper instead of the end of the roll. Help your child write the name of a season on each piece of paper under the roll, or “trunk,” of each “tree.”
- Go outside with your child and look at the trees in your yard or neighborhood. Talk about what season it is and have your child describe the colors of the leaves on the trees. Discuss any other things you see on the tree, such as flowers, berries or empty branches. Look for any animals that make their homes in the trees, such as birds or squirrels.
- After your nature walk, give your child the piece of paper for the current season. Show him how to decorate the tree to illustrate that season, and then help him decorate the other three seasons:
- Winter: Show him how to glue the brown yarn onto the paper above the paper roll “trunk” to create bare branches.
- Spring: Have him use light green construction paper to make leaves for the spring tree. Let him glue the popcorn on to make flowers.
- Summer: Have him use dark green construction paper to make leaves for the spring tree. He can also draw fruit on the tree or glue colorful buttons or circular scraps of red or orange paper.
- Autumn: Use the yellow, orange and red construction paper to make autumn colored leaves for the fall tree.
- Hang the pictures up in your house so you can enjoy all of the seasons no matter what the weather is outside!
Download activity
Read more on Education.com
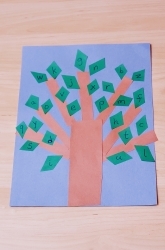
Branch Out: Create an Alphabet Tree
 What you need:
- Construction paper in brown and green (or other colors)
- Ruler
- Markers
- Scissors
- Glue stick
What You Do:
- Help your child come up with shapes to form a tree. For example, a large rectangle could be the tree trunk, smaller rectangles could be the branches, and circles, diamonds, or triangles could be the leaves.
- Measure a rectangle about 6″ tall and 2″ wide on brown construction paper, and help your child cut it out to use as the trunk. (Note: measurements don’t need to be exact. Feel free to eyeball it!)
- For the branches, cut a rectangle 8 1/2″ tall and 2 1/2″ wide. Fold it in half horizontally, then cut along the crease. Stack the two pieces together and cut the pieces vertically into four strips (about 3/4″ wide). Because they are stacked, you should end up with eight strips total.
- Cut out 26 shapes for the leaves. You can use green construction paper or orange, yellow, and red depending on the season. Leaf shapes should be a little bigger than a dime.
- Invite your child to glue the pieces together onto a piece of construction paper. Glue seven of the eight strips onto the large rectangle (the leftover one can be recycled since it’s not being used). The branches should fan out of the top of the trunk, with enough space between each branch for some leaves to fit on either side.
- Glue three or four leaves to each branch, making sure to use all 26. Then set it aside to dry.
- Hand your child a marker and invite her to write each letter from the alphabet on the leaves. If she is unable to do this yet, you can write the letters for her as long as you end up with all 26 letters on your tree.
- When you’re finished, invite your child to identify each letter and the sound it makes! If you like, couple this art and letter recognition activity with a read-aloud experience. Good books to read before or after this project could be The Alphabet Tree by Leo Leonni or Chicka Chicka Boom Boom by Bill Martin, Jr. and John Archambault.
Download activity
Read more on Education.com
Food from Trees
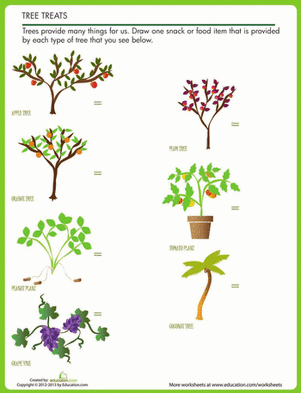
What delicious treats do we receive from trees? Your child can draw their favorite tree-provided snacks in this cute drawing worksheet.
Get this worksheet
Read more on Education.com
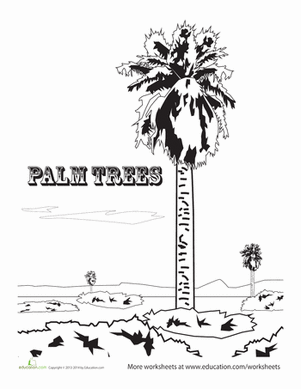
Palm Trees Coloring Page
Here’s a great chance for the advanced coloring artist to really shine! Color in this postcard-esque scene of the palm trees in Joshua Tree National Park, and try for an early evening sky full of different colors and a landscape of dark shadows.
 Get this worksheet
Read more on Education.com
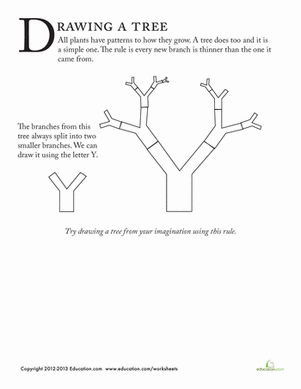
How to Draw Trees
Indulge your inner artist with a fun drawing lesson. Kids will hone fine motor and handwriting skills as they learn how to draw trees. To expand this activity, have your child draw more scenery around the tree to show setting, and maybe even write a story about their drawing.
 Get this worksheet
Read more on Education.com
And if you’re looking for some fun and easy Tu Bishvat recipes, check out Kid-Friendly Tu Bishvat Recipes.


